Огромная благодарность
Kellig за Мастер-класс

This Gerbera Daisy Tutorial will teach you how to make lifelike sugar Gerber Daisies quick and easy!
List of Materials
- Clean Styrofoam egg carton
- Torch or lighter
- Wilton small flower former
- Rolling pin with pink rings
- Thin foam
- 1 small ball of gum paste for center in your choice of color
- and 1 medium ball of gum paste for petals in your choice of color
- Small scissors
- Ball tool and Veiner
- Paint brush
- Gum glue or vodka
- 6” piece of wire
- The small Daisy cutters are from the first Wilton 32 piece flower making set
- The other larger cutters are from the new flower cutter set
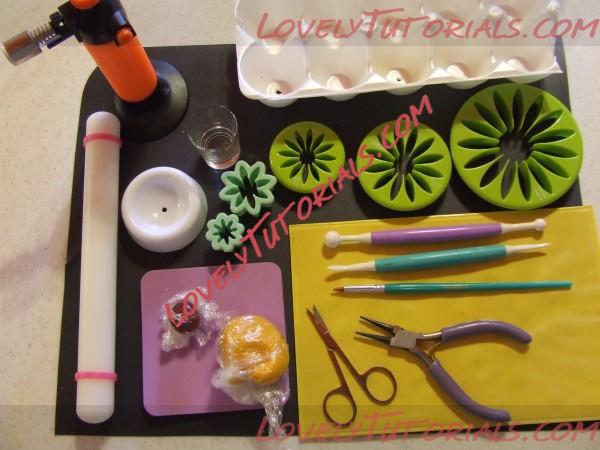
This is a picture of the supply list.
Form center for flower by rolling it into a ball then lightly smash it down the center with your finger to from a disk shape. It should be about ¾ of an inch in diameter. With you small scissor snip into the ball to make it look like the center of a daisy.
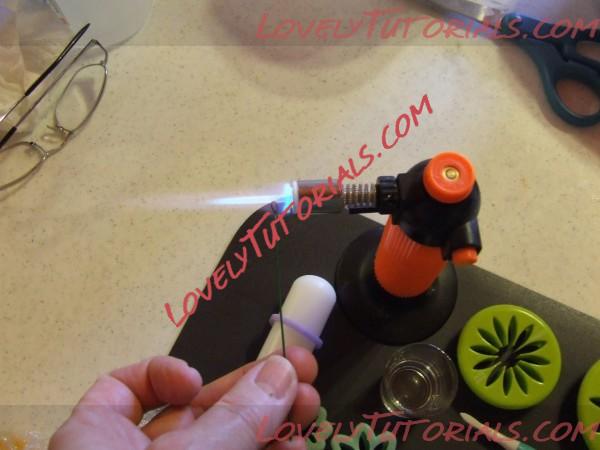
When I make a heavy flower that needs to hang upside down, I use a lighter or a torch to get my wire hot, so that the gum paste will melt around it. Carefully, and slowly, push the hot wire through the center of the disk, being very careful not to push it through too far and burn your fingers. Do this at your own risk!!! Hot sugar keeps burning for a long time if you get it on you.
Set aside to let cool and set.
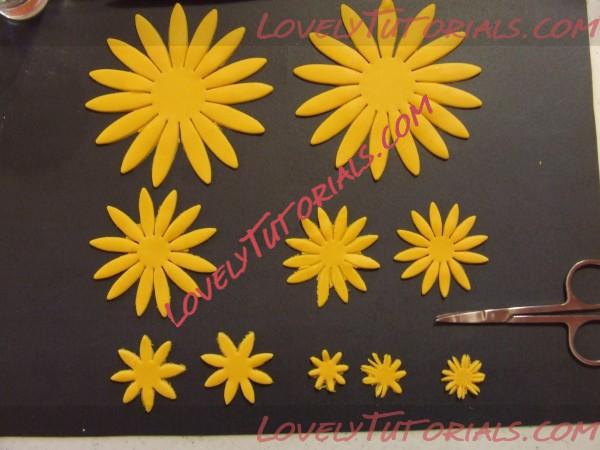
1. Cut out the following Daisy shapes
2. Largest new cutter, cut 2
3. Medium new cutter, cut 1
4. Small new cutter, cut 2
5. Largest cutter from old set, cut 2
6. Small cutter from old set, cut 3
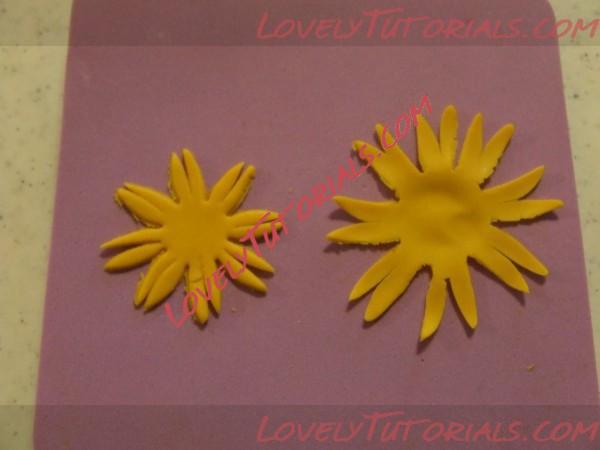
Snip petals -numbers 4 and 5 from the list above- in half so instead of 8 petals you have 16. Use a ball tool to thin and soften edges. You don’t have to be too particular as you will only see the tips of these petals. Continue to do the same with the larger petals (#5 from the list above)
Paint a small amount of gum glue or vodka on the wired center and a little on each of the petals and wrap both small flowers (#5) around the flower center disk
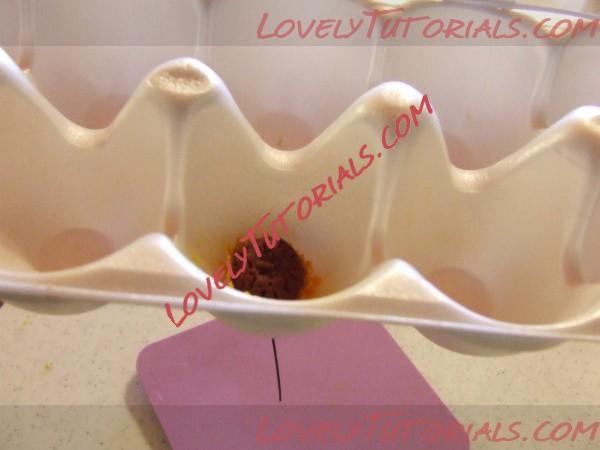
Poke wire in center of the cup of an egg carton to dry for approximately 10 to 15 minutes. I formed all my centers at once, and then used the ones I did first that were dryer.
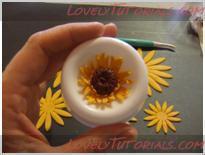
Follow the same procedure for snipping and thinning the next size (#4), but instead of putting them in the egg carton put them in the flower former.
Set aside to dry and set.
Soften and thin the rest of the cut out flowers, don’t snip any of the larger petals.
Using the veining tool go around the outside edges of each petal, this is the secret to making them look realistic, because it pops up the edges and centers of each petal.
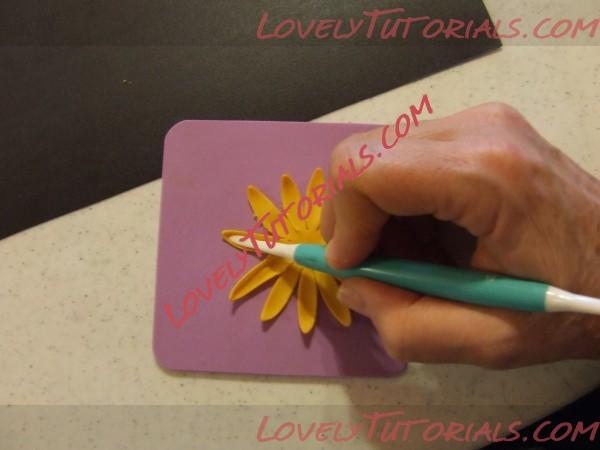
Place the flower cutout on the center of thin pink foam pad, which has a hole in the center for the wire. Use a small amount of gum glue on the petals and then slide it up and attach it to the flower, alternating the petals. Follow the same procedure until all the petals are attached to your flower.
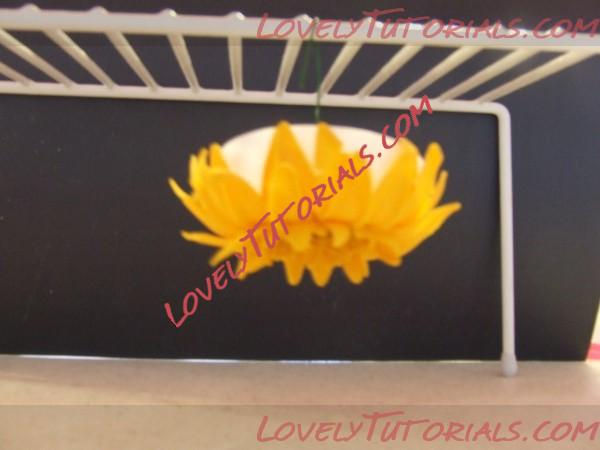
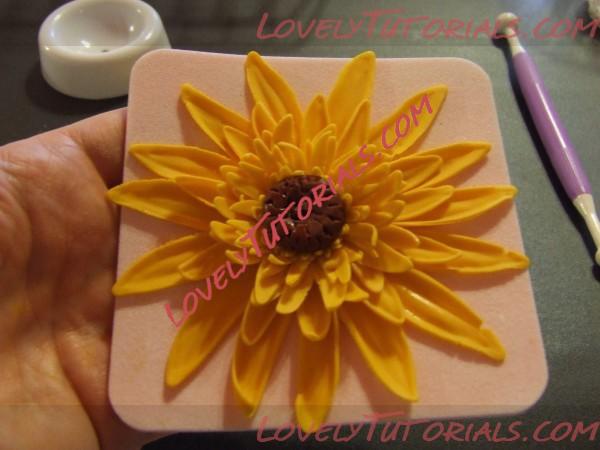
Dry it on the small white flower former over night. The petals will look wilted and flat, but after the flower has dried for about 24 hours you will hang it upside down and gravity will make it look more alive.
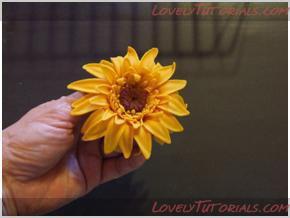
This one looks kind of rough, as it took me longer to make (because I was taking one handed pictures) so the petals dried out and cracked.
I used some petal dust on my first ones to highlight and darken the shadows.
If this tutorial is not clear or if you have questions please feel free to PM me.
Thanks!
Kelli
