Огромная благодарность Автору sweetbitescakes за Мастер-класс
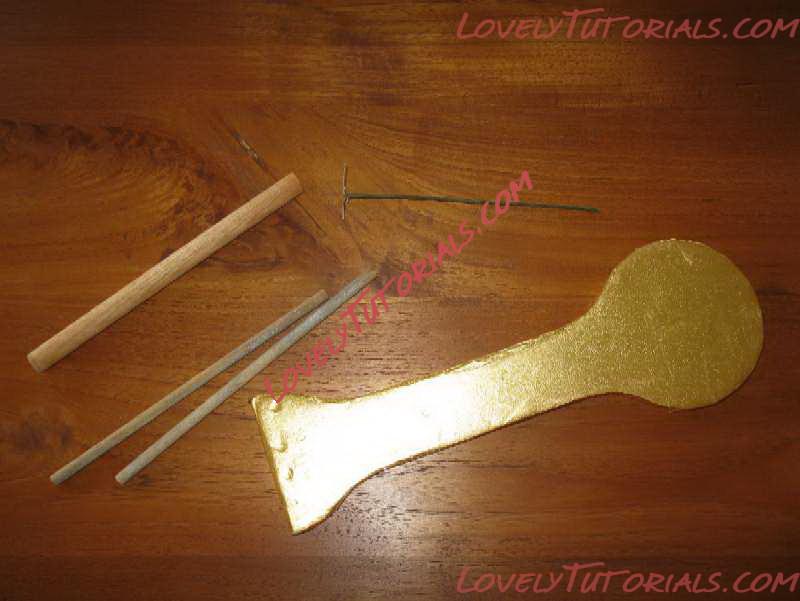
Days before the cake had to be put together, I made the pins, cottons, screws, machine foot, buttons, silver thread holders and hand wheel out of flowerpaste. The wheel had to be supported on a saucer to get the shape. I taped (florist tape) 4 wires together (as in parts pic) they went through the wheel and were covered with a silver circle. So they weren't seen. this allowed the wheel to be pushed into the cake just above the support board. I suppose very firm royal icing would have held it in place but wasn't prepared to risk it.
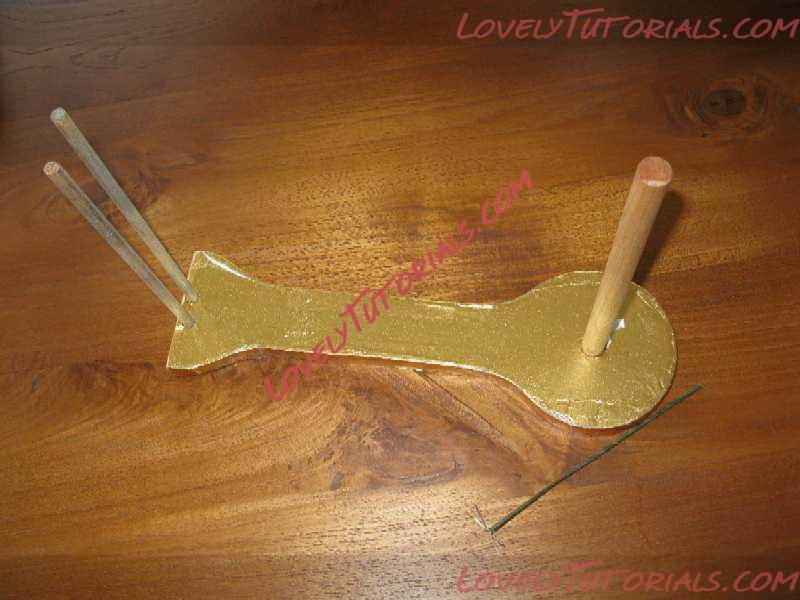
I borowed an old machine off my father-in-law. I was careful to have the cake be an exact replica size wise. My father-in-law then kindly cut me a wooden support the exact shape of the cross bar of the machine. He also made dowels cut to size and put holes into the support board for the dowels to slot into. I covered the support board with cake paper as cake was going directly onto it. The twin thin dowels I painted with silver food dust mixed with vodka. They became the needle and foot part of the machine.
I baked an 8inch by 11 inch chocolate mucake. Covered it with white chocolate buttercream and beige coloured fondant which I painted with brown colouring paste mixed with vodka to resemble a wooden board for the machine to sit on. When it was dry I put on the black bottom plate of the machine. I did this by coloring chocolate fondant black, and rolling it out between layers of baking paper. Its hard to handle black icing and I find this works everytime! I peeled off one layer. Cut the fondant to a rectangle shape and dampened the surface a little. - then using the paper to pick up the icing, flip it over onto the 'wooden board' cake and eased it into place before smoothing down with the cake smoother.
Then I baked a second cake. I cut this into 3x 4inch circles by using a small cake board as a pattern. I layered the cakes with more buttercream, carved them to resemble the gentle curve of the machine stand. Chilled. Then placed them onto the already prepared 'wooden board' (1st cake). Then inserted the fattest dowel into the middle.
Next, I inserted the 'needle' parts - pushed the thiner dowels into the 'wooden board' (1st cake) and added the foot. I then placed the support board onto the dowels and slotted them into position. I then cut and shaped the cake to go onto the support board.
The part of the machine above the neddle part but below the support board could not be cake. I couldn't guarantee that it would stay up, so I cut it from polystyrene and taped it to the underneath of the supprt board. Covered it with cake paper and then buttercreamed the entire cake again, including the small poystyrene part. Using more of the black coloured chocolate fondant. I cut and covered the poystyrene part of the machine and the base on the right. Then rolled out (again between sheets of baking paper) enough fondant to cover the cake above the support board. Smoothed it all down as best I could and allowed it to dry.
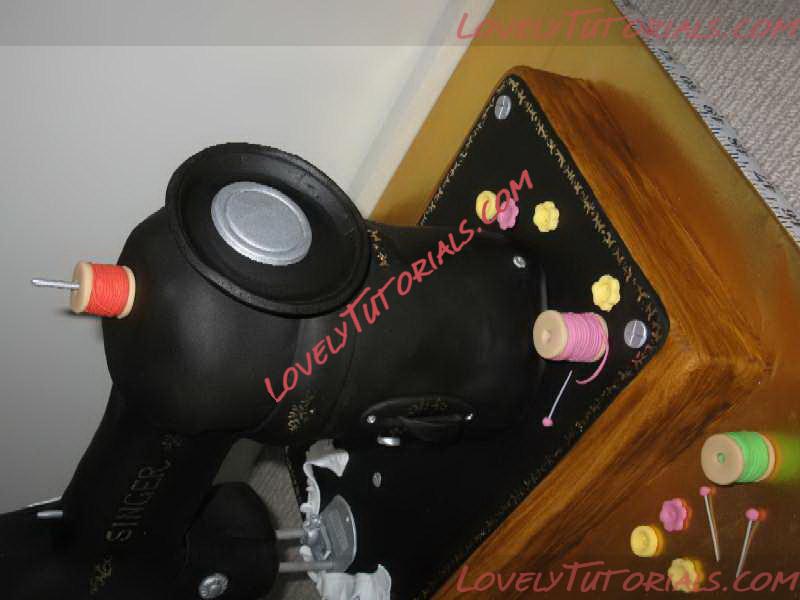
Next, I added the screws, the hand wheel and all thread holders etc... I mixed gold powder with vodka and painted on the logo and design around the machine plate (I did this all free hand and it may have been better if I marked it out, but nevermind)
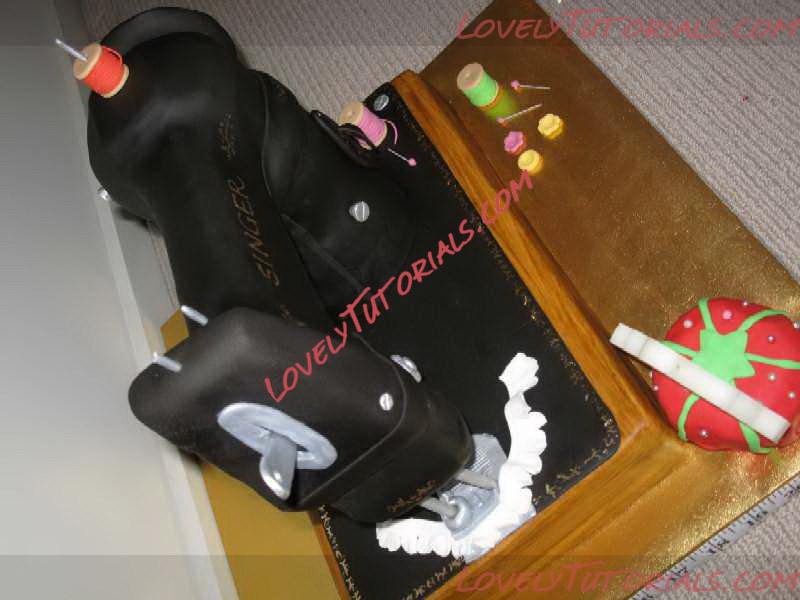
The pin cushion is more of the left over cake, covered with jam and buttercream and then red fondant.
The 'lace' is thinly rolled fondant with stitch lines, showing out the back of the needle and foot part. no stitch lines front of the foot as that hasn't been 'sewn'.
I really enjoyed making this project and was delighted with how well it came together - I had envisioned a real nightmare working with the black icing.
I hope this helps anyone attempting to make a similar cake - let me know how you get on!