спасибо огромное
artisancakecompany за МК
слова и фото автора
Edible Trees
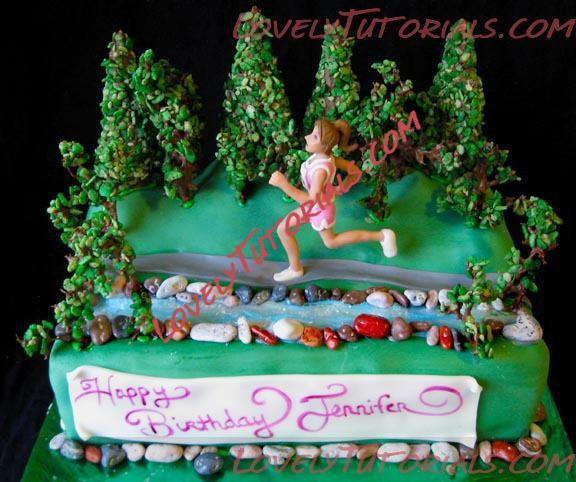
I was recently contacted to make a cake for a runners 35th birthday. This runner is going to be competing in the upcoming columbia gorge marathon and so we decided to do a cake theme around that event. It took me a while to find a way to make some trees for the cake that would look pretty realistic but were also pretty edible (I do realize that grape stems are not technically edible but its better than wire) I found a couple different techniques that I think worked pretty well and thought I would share them with you. Enjoy!
Liz
STEP ONE (gather your supplies)
Two bowls
Rice Krispies Cereal
Chocolate for melting
Floral wire
Grape stems
Sugar ice cream cones
Green food coloring
Spray bottle or food coloring airbrush
Wooden dowel
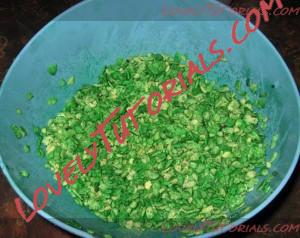
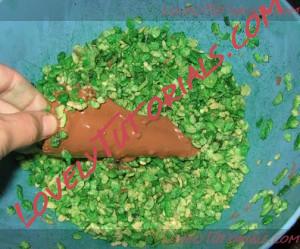
Step 2 (dying the rice krispies)
Rice Krispies Cereal dyed green. Make sure you use a fairly large bowl so you can shake off excess cereal when dipping without making too much of a mess.
I dyed mine with an airbrush but you can use a spray bottle with water and green dye. Just spray, mix, spray, mix until green. Don’t do too much or you’ll get soggy treats.

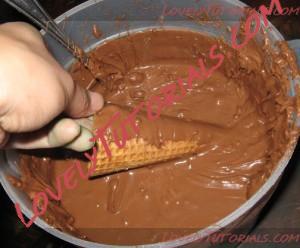
 Step 3 (melting chocolate)
Next we need some melted chocolate. I use tree bark that I get from the food supply store but you can also use any chocolate for candy making. Put chocolate in microwave safe container and melt in 15 sec intervals starting off with 30 seconds. Make sure you stir between heating. if you try to melt too fast and too hot, you will scorch your chocolate, it will seize up and get lumpy and you pretty much have to start over.
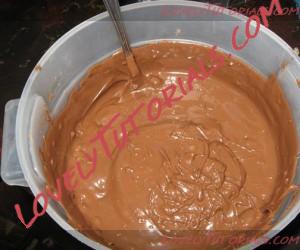
melt chocolate at 15 second intervals
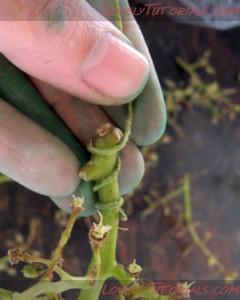
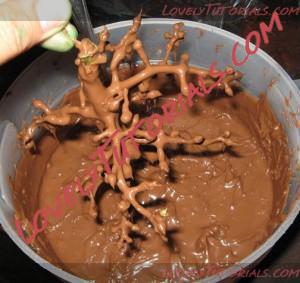
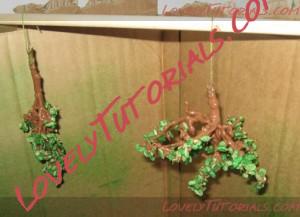
Step 4 (Making trees from grape stems)
Gather your grape stems and attach some floral wire to the ends. This will make it easy to hang our trees to dry. Wrap the floral wire around the base and dip stem into chocolate. Shake excess chocolate off the stem so the ‘branches” are easily seen.
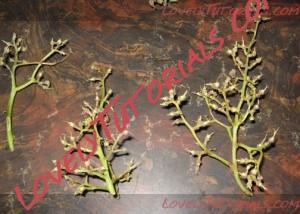
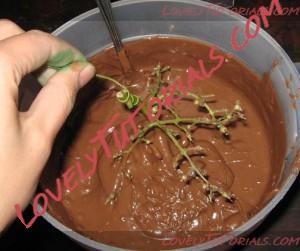
shake off excess chocolate
Dip your stems into the rice krispies to add “leaves” then hang on your dowel to dry


 Step 5 (making the cone trees)
For these trees, the process is similar but instead we are going to use sugar cones to make more evergreen looking trees to give our cake a little variety. You could use something other than green rice krispies if you wanted to like green sprinkles or other candies but I just used the same rice krispies.
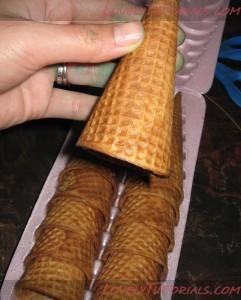
use sugar cones
rotate cone in chocolate
add "leaves" to cone
I just set these cones on the table over some parchment to dry.
After everything is dry, poke holes into your cake and then push your trees into the holes. I attached the cone trees with some royal icing.
For this cake I also added a path, a sugar runner I made, a river made of melted chocolate and sparkle gel and some chocolate “rocks”


I hope this tutorial was helpful to you.
HAPPY BAKING!