Огромная благодарность Автору Royal Bakery за Мастер-класс
Look at me! I started a tutorial project and think I managed to remember to take photos all the way through! That has to be a first!
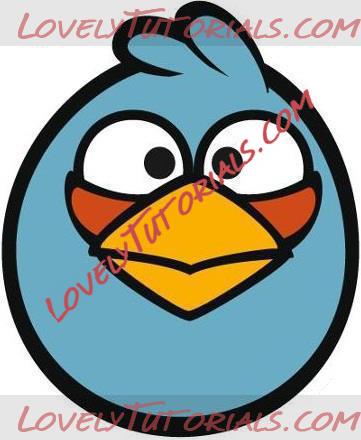
Whenever I have to make a cake of a TV, film or game character, I always try to find a photo of it looking straight into the 'camera', as it were. Then I enlarge or reduce it to the size of the cake so I know the facial features will be exactly the right size and I can place them in exactly the right position. This is SO important if you want to make your character look just right.
So I found these drawings, which are perfect for the job. I've added the links here too, so you can download one if you like. Without a 'full-frontal' like this, you'll find it hard to cut the right shapes and position them correctly. I used the second one.
I baked the cake using the 6" Wilton Sports Ball pan. Once the cake was cooled, I put each half back in the pans and used the top of the pans as a guide to level the domes off. Then I removed them from the pan once again and sliced off another 1/4" or so off each cake. Put a square of plastic wrap (cling film) in each half of the pan and once again transfer the halves of the cakes back to the pan. Now fill the gap in the top of each one with buttercream, or the filling of your choie. Use the top of the pans as a guide to perfectly level the buttercream. This way, when you put the two halves together, you will have a perfectl sphere. I actually piped a dam of ganache into each pan before adding the buttercream to help maintain the spherical shape and stop the buttercream bulging out, but you may not wish to do this.
Close the plastic wrap around the top of each half of the sphere and freeze for half an hour or so.
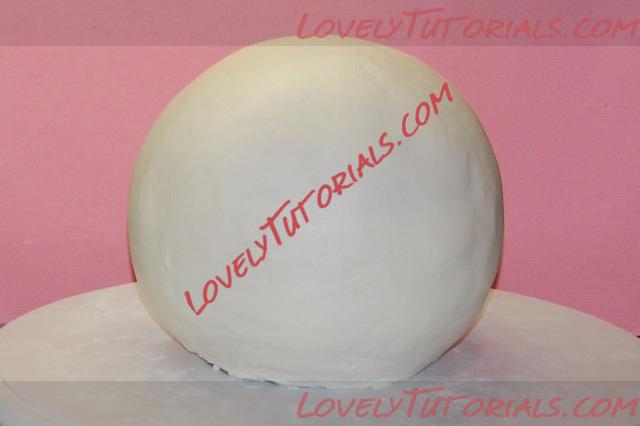
Once the cakes halves are partially frozen, remove them from the freezer and use the plastic wrap to help remove them from the pans. Put the two halves together and you should have a perfect sphere.
While the cake is still frozen, apply a crumb coat of buttercream, or ganache to your cake. I used buttercream as I wasn't sure if I'd be able to get a smooth enough finish with ganache. I actually sliced a tiny piece off the bottom of the cake to help keep it stable and upright while I worked. I used a piece of flexible acetate to help smooth my buttercream.
Naomi from Tea Party Cakes has a wonderful tutorial that helped me a lot. Her finished sphere is a trillion times better than mine!
http://www.lovelytutorials.com/forum...ead.php?t=3934
Since making this cake, I also made a black Angry Bird and used a similar technique to apply and smooth ganache rather than buttercream. It gave me a much better result and the ball kept its shape perfectly. I just have more experience with ganache, I think!
Next, prepare the bird's facial features, plus its beak, crest and tail. I use Wilton fondant for all of these pieces. I know it has a repuation for tasting awful, but it keeps its shape so perfectly and cuts so smoothly, I wouldn't use anything else.
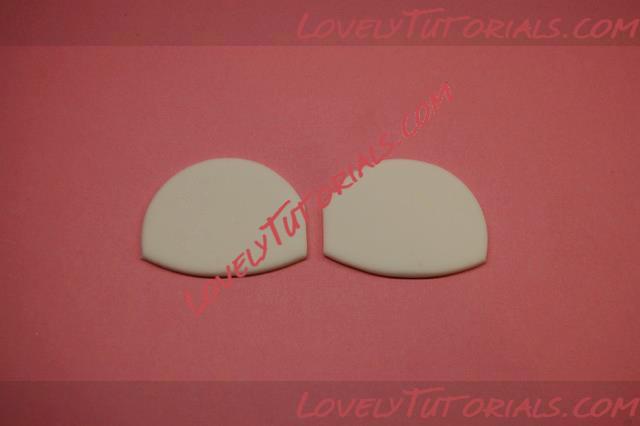
Using your to-scale picture as a guide, choose a circle cutter to cut the whites of the bird's eyes.
Then use a much larger circle cutter to remove a portion of the eyes.
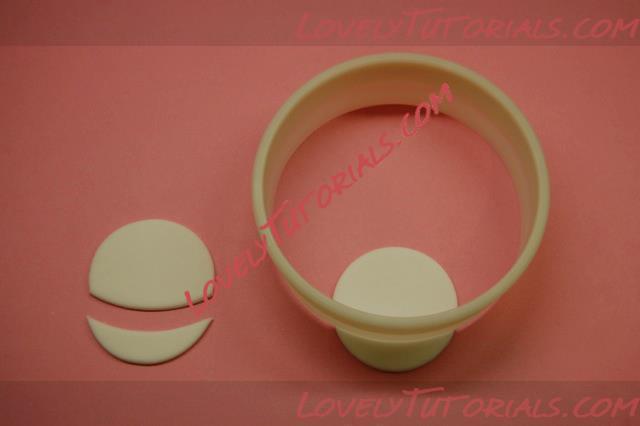
Then, once again referring to your photo, slice a tiny amount off the inside of each circle, if you like.
Now work on the red portion under the bird's eyes. I used a slightly larger cutter than the one for the eyes.
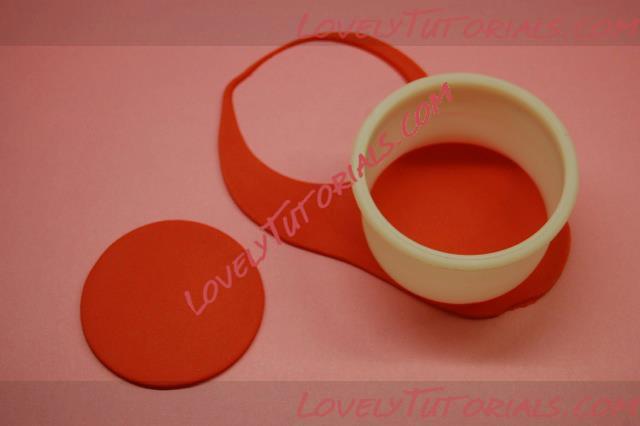
Then use the same largest circle cutter to remove a portion of the red part to fit under the eyes.
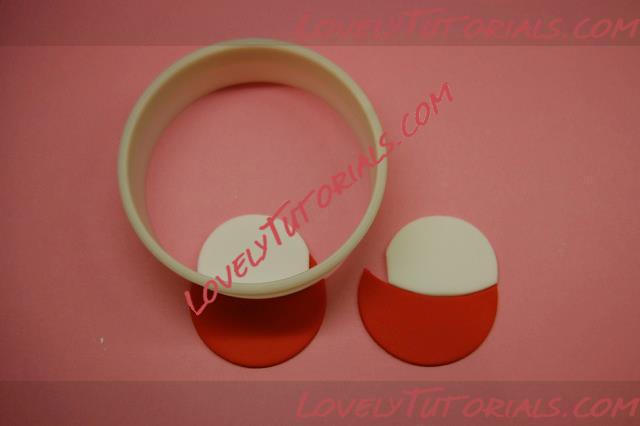
Slice off a portion of the red part at an angle, which is where the beak will go. Use your photo as a guide for the angle.
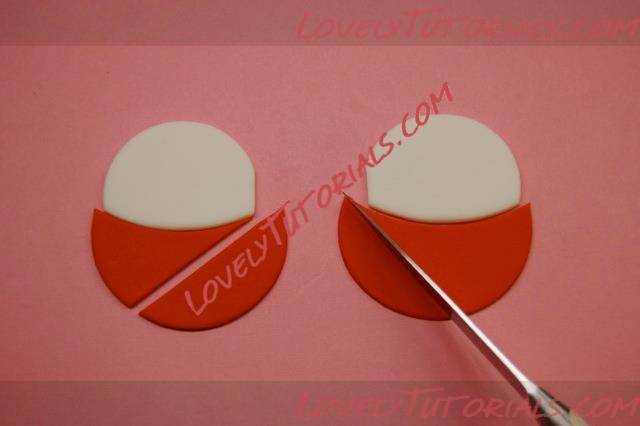
Again, using your photo as a guide to the size, cut two black eye balls. I used a large round piping tip. Stick these in place.
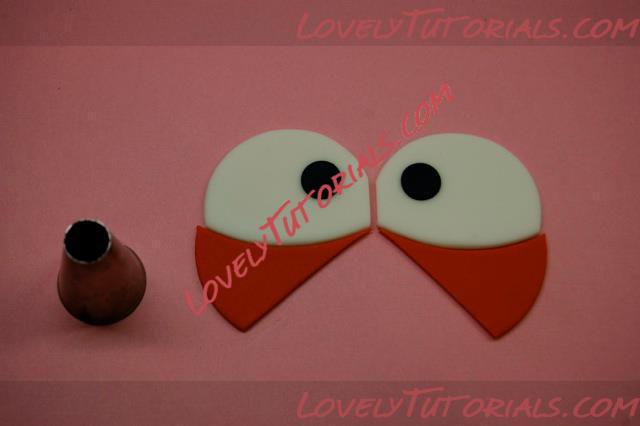
I then put these fondant pieces in an airtight container with a small piece of bread. This helps keep them soft until you need to use them. If you prefer to make them many days ahead, you can put the airtight container (without the bread) in the freezer. Half an hour before you are ready to apply them to the cake, remove the container from the freezer, take off the lid and don't touch until the condensation that forms evaporates. Once the pieces are dry, they will be as soft as when you first made them, and easy to add to the shape of the cake.
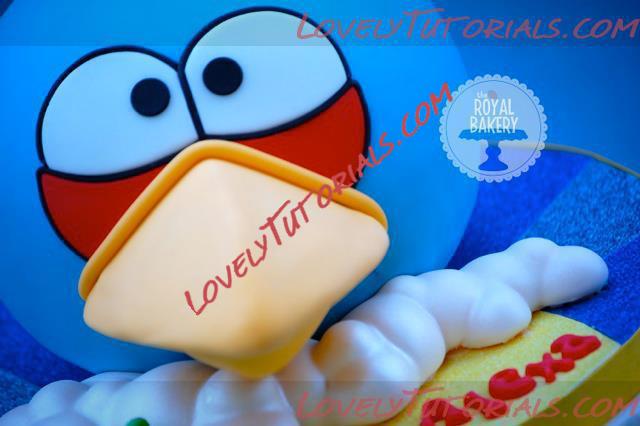
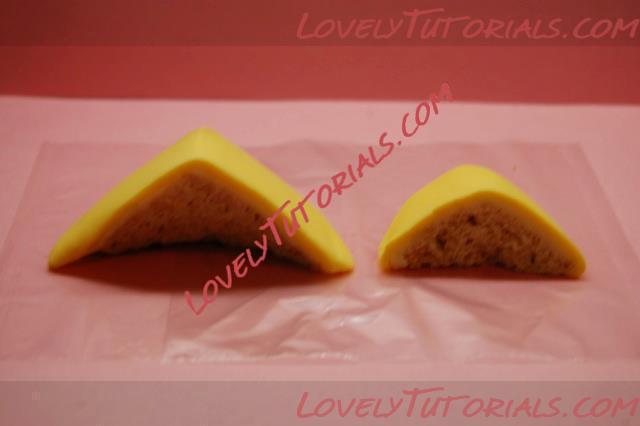
Now make the beak. This is the hardest part of the whole cake, I think, as it's very difficult to work out what shape it actually is, and form it in such a way that it fits flush with the cake.
Using your photo as a guide, use Rice Krispies Treats (RKT) to carve a beak shape. I did the top and bottom beak separately, but if I did it again, I'd do it in once piece, I think. I think it's best to use RKT to keep the beak light. If you use purely fondant, it will be too heavy for the cake.
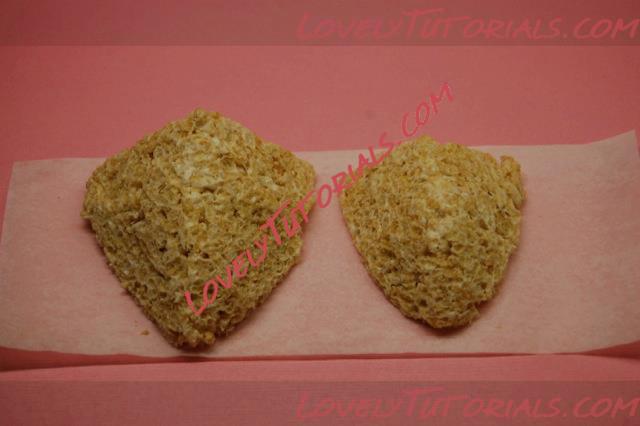
It really is hard to tell you how to carve the shape. The top beak part is longer than the bottom and is carved to a point at the front. Viewed from the front, it is like a triangle. The bottom part of the beak is the same sort of shape, but not as long or wide as the top.
After carving, I realised I should have shaped the RKT on top of one half of my ball pan to ensure that the beak would sit flush on the cake once it came time to add it. I had to carve the back of the beak into a curve to deal with this oversight!
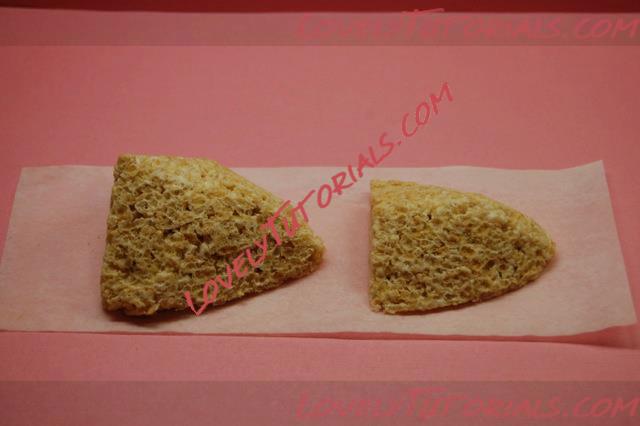
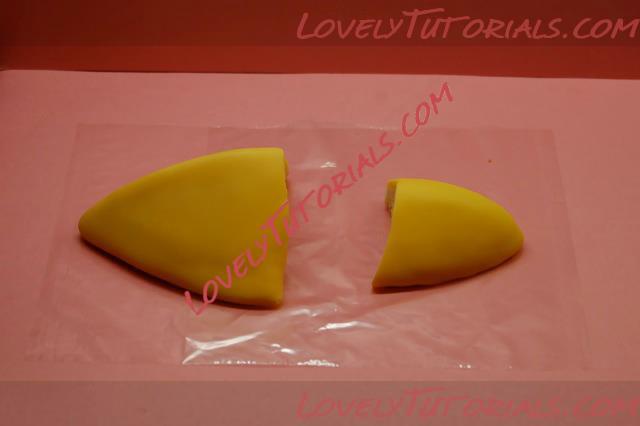
Here are the beak pieces once I'd covered then first in white chocolate ganache to smooth out the lumps in the RKT and then in yellow fondant. This isn't shown in the photo, but I cut two bamboo skewers in half and inserted two pieces into each part of the beak to help secure them to the cake later.
Next, I made the bird's crest. I coloured white Wilton fondant using Wilton Cornflour Blue. Be careful when you add the colour as the fondant darkens a little over time.
Form a teardrop shape around 2" long (depending on the size of your cake). Lay the teardrop on the ball pan so that it will be the right shape when you add it to the cake.
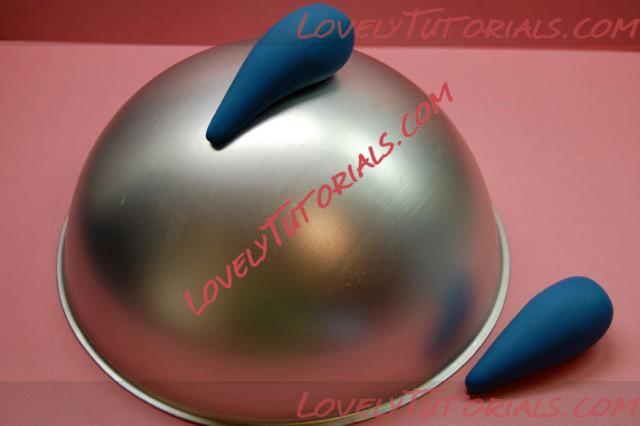
Form a second teardrop the same size as the first and, using a little water, lay this on top of the first one so that the point is covering the point of the first.

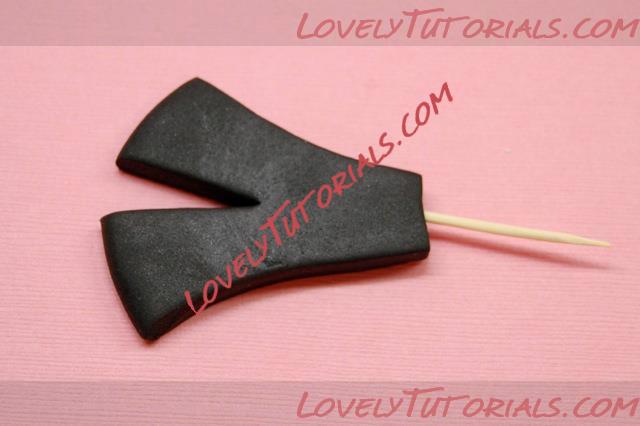
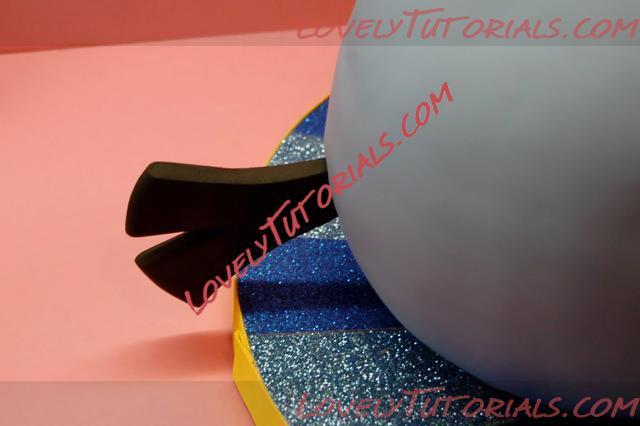
I next cut the tail from a 1/2" thick piece of black fondant. Insert a toothpick into it to help secure it to the cake later.
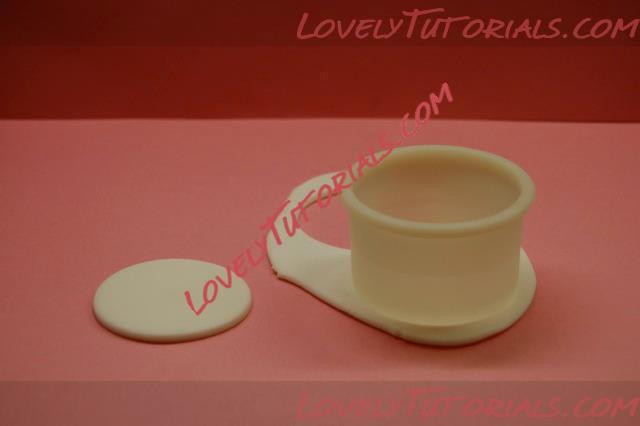
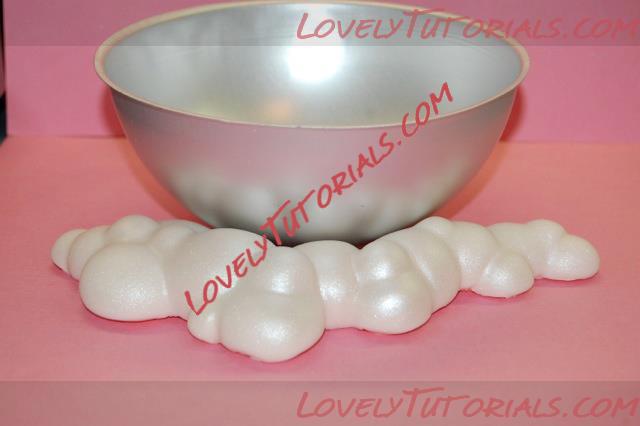
I created a large cloud shape which I thought would help keep the cake stable on the board, support the beak and hide any dodgy fondant work I might end up with.
I use a lump of fondant to stick half of the ball pan to my work surface and then created the cloud using the shape as a guide. I sprayed the finished cloud with pearl lustre dust.
It's ridiculously, stupidly hard to cover a sphere in fondant. The only tips I can really give you are to roll your fondant nice and thin - mine was about 1/16" (maybe 2mm) thick - and roll a piece that is much larger than you needed. A 6" sphere has a circumference of about 18.5", so I rolled my fondant out to a diameter of about 25". (You remember how to work out the circumference of a circle from its diameter from school, right? Multiply the diameter by pi, which is 3.1415 etc. I just multiply it by 3 and then add a bit on for good measure.)
Drape the fondant over your sphere and as you would when covering any other type of cake, quickly pull the 'skirt' of excess fondant away from the sides of the cake. You are trying to stop pleats from forming before you have time to smooth the fondant. I can only tell you to just smooth the fondant all the way around, inching your way down and continuing to pull the excess out and away from the cake as you smooth. Eventually, I just lost the will to live, and just stuffed the rest underneath. It was by no means a perfect job, but it did go much better than I had imagined. AND it was Satin Ice fondant, and you all know how much I hate that sutff.
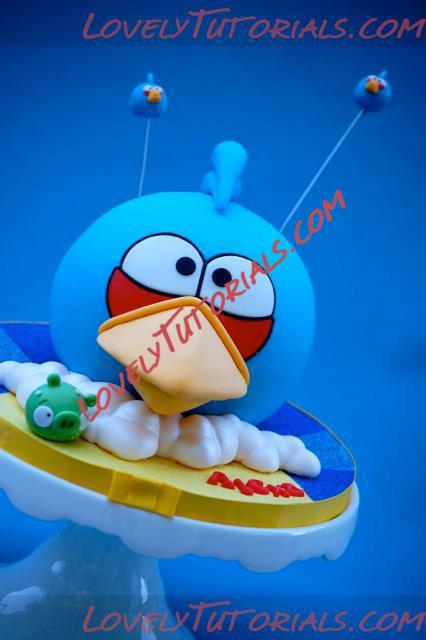
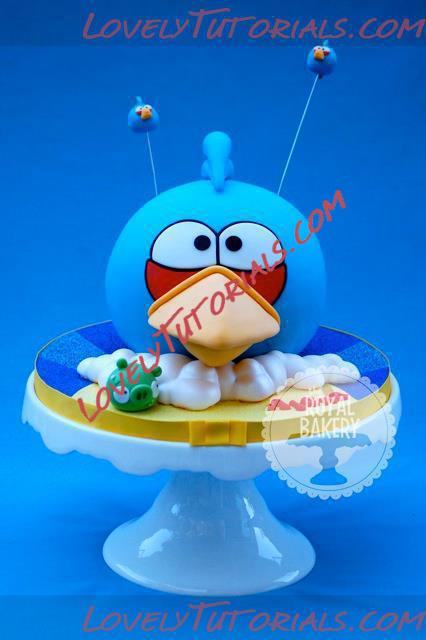
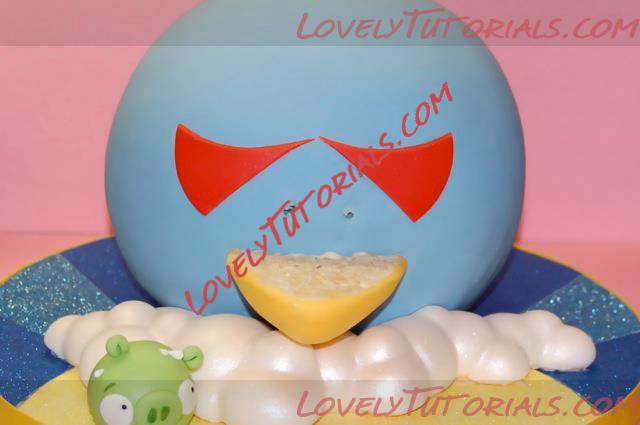
I did miss out a few photos here, but you get the gist. Add the crest to the top (I supported this just in case on a drinking straw inserted into the cake), stick the cloud underneath the cake so it doesn't roll away, and then poke the bottom of the beak into the cake so that it can rest on the cloud.

I positioned the top beak on the cake and traced around it with a knife then removed it so I could see where to position the red eye parts. The beak will cover the bottom of the red pieces, if you position them correctly.
I extruded a length of black fondant and stuck these around the red eye parts.
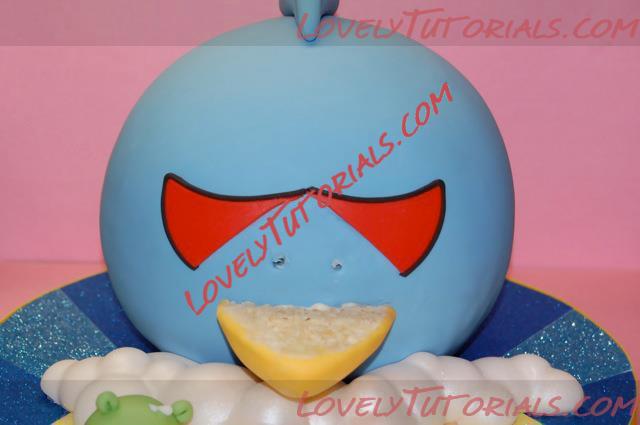
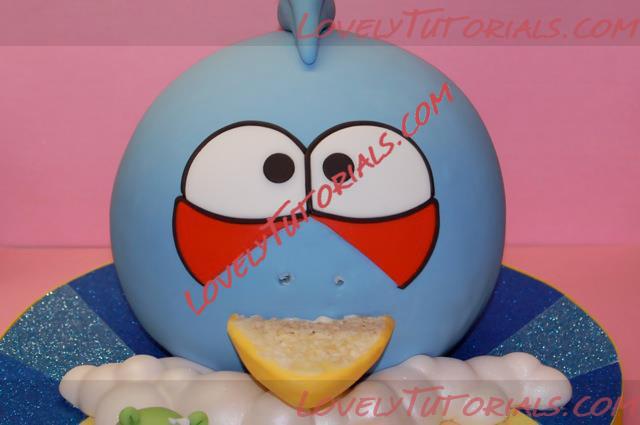
Stick the whites of the eyes above and add more extruded fondant around and between them.
I added the top beak at this point and discovered that, despite the fact that I'd tried so hard to create a beak that would sit flush on the cake, it did not. I rolled a length of yellow fondant and stuck this around the beak to disguise the gap. Grrrrr.

Poke the tail into the cake at the back.
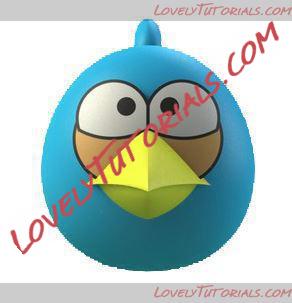
I sort of had in my head the Angry Birds title screens when I designed the board - the light and dark blue rays expanding out from a yellow sun, but I think I imagined it. Along with the cloud, I was going for something that was a combination of these two photos:


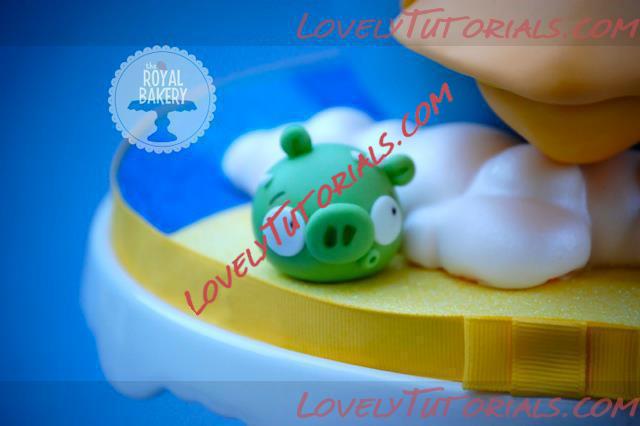
I used glitter scrapbooking paper (I'm a bit obsessed by that stuff) to cover my board, and added a little sweating piggy looking up at the big bird.
I made two other tiny blue birds and added these on wires, stuck into tiny stirrer straws inserted into the back of the cake. They span around in an annoying fashion, so next time I'll pipe melted chocolate into the straws first to keep the wires in place.
I think that's about it! Let me know if you have any questions, or find one of my many deliberate typos!