Огромная благодарность Handmade Queen за Мастер-класс
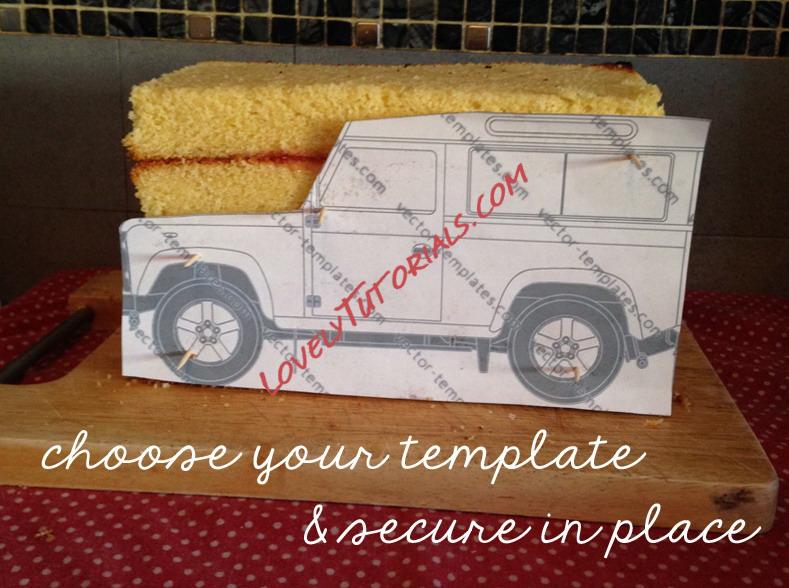
When creating a 3D cake ALWAYS have images to hand as a guide and work from a template to ensure you have the correct proportions, it makes life so much easier!
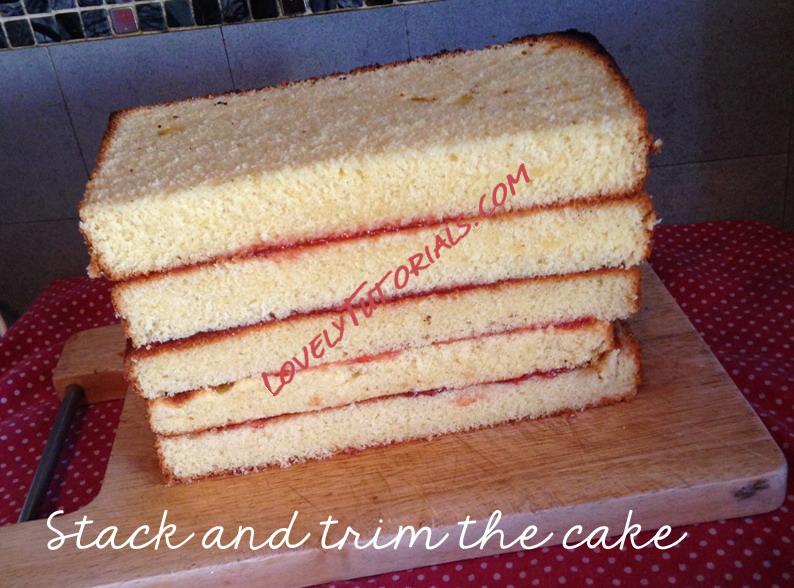
Secure your template to the trimmed & stacked cake using cocktail sticks then begin to carve the shape.
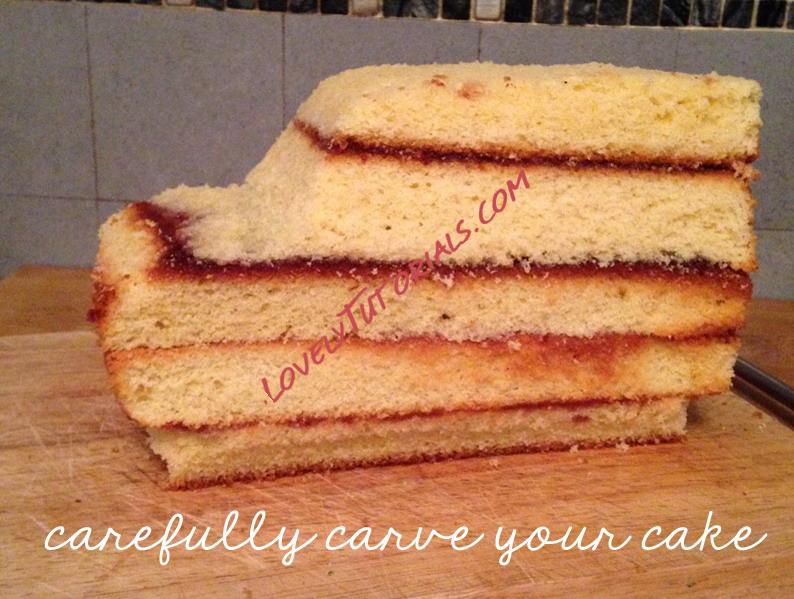
Do not hack away at the cake, cake needs a little love so carve section by section eg trim the roof, next the windscreen and then the bonnet.
Don’t forget to use a template on the front/back of the cake to make sure the width is also in proportion.
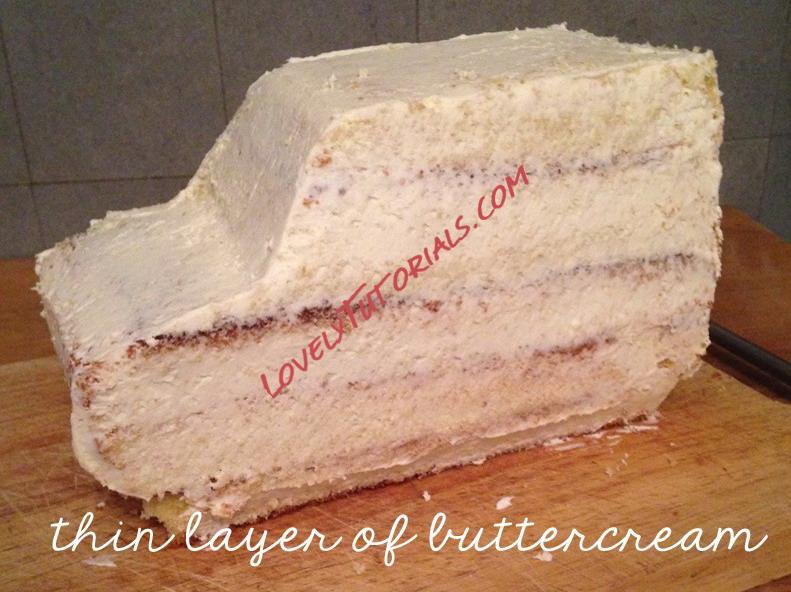
Crumb coat the cake with a thin layer of buttercream at this stage. This gives a better idea of the shape, you can then decide if it needs a little extra trimming off. Leave the cake for about an hour before moving onto the second layer of buttercream.
Once this has set you will be able to handle the cake better in order to make the wheel arches, if we tried doing this at the start the cake layers could move & we’d just get in a mess. Believe me, I’ve made that mistake!
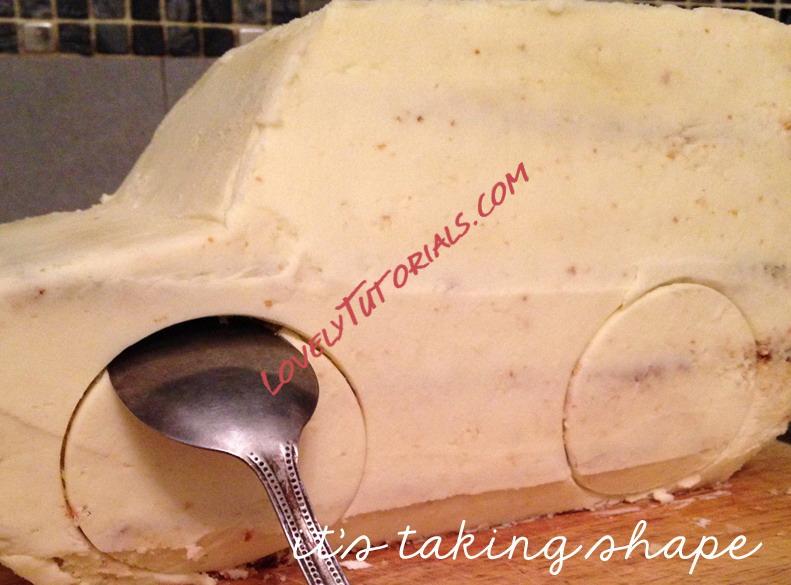
Choose three cookie cutters, the smallest cutter is used to cut the wheels from black fondant. The second size up will create the arches. Press the cutter into the cake then gently remove excess cake with a spoon.
Add the final thin layer of buttercream over the whole cake, including inside the arches. Using the third cutter, cut four circles from black fondant then insert into the arches, smoothing gently. Next, add strips of black fondant around the bottom of the cake, then the fun bit starts, covering the whole cake in fondant!
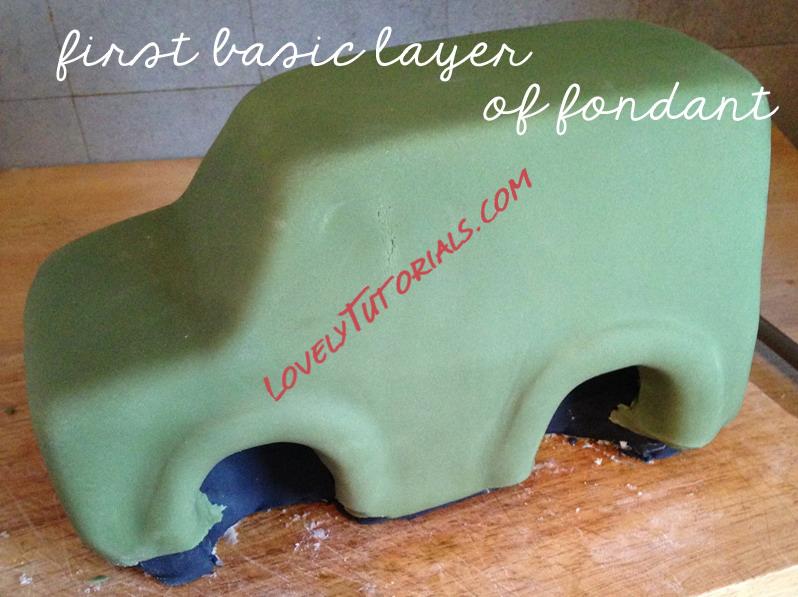
Be very careful not to stretch or tear the fondant. Start from the top of the roof and smooth down gently with your hands, taking care to tuck the fondant into the wheel arches. You can then use your ‘smoother’ to finish.
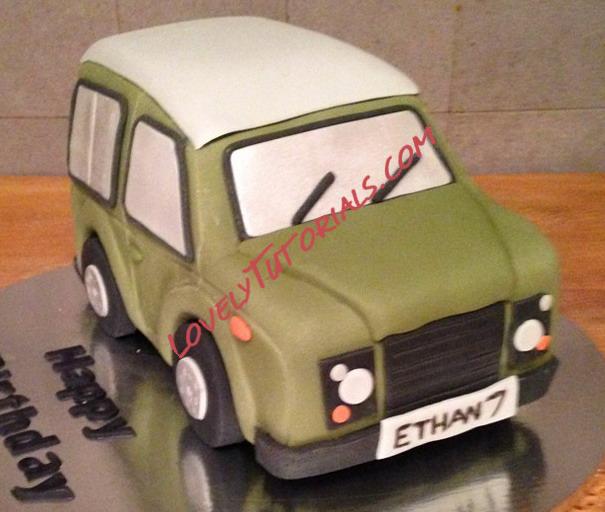
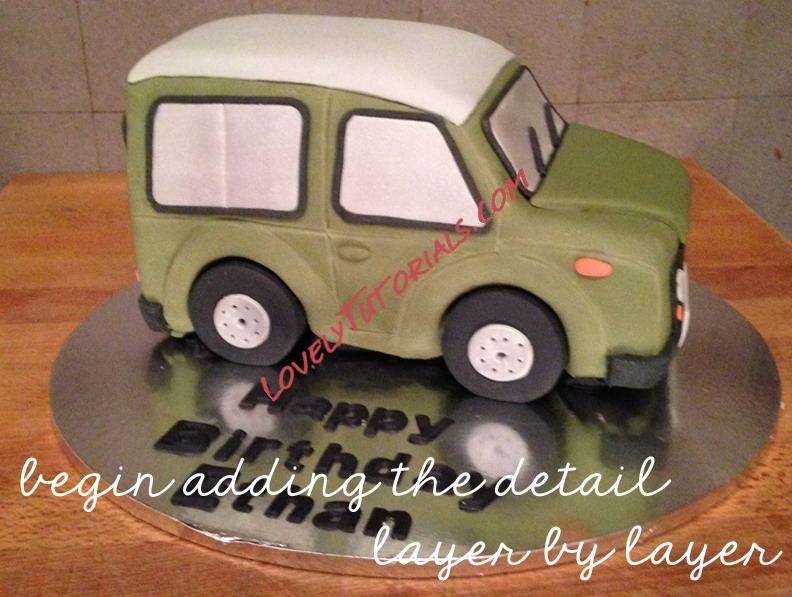
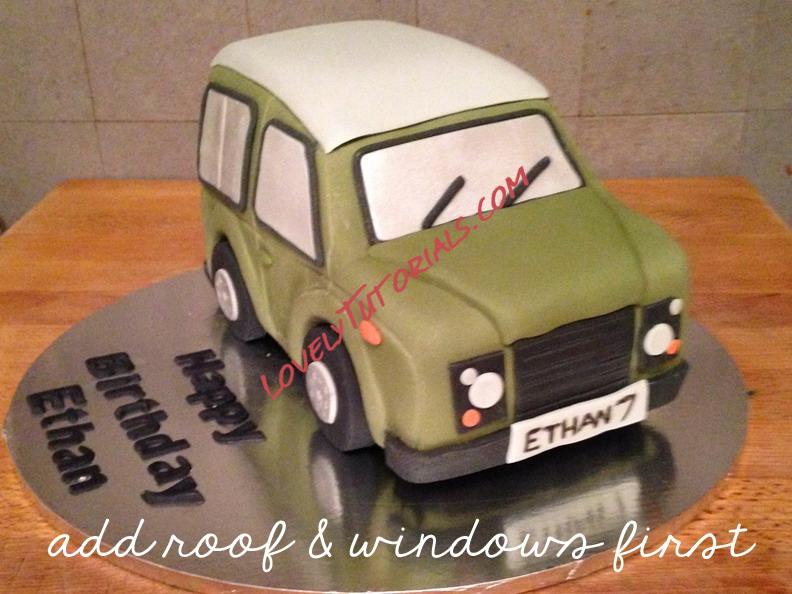
The final and most fun step is adding the detail; this is when your cake will really come to life.
Firstly, don’t get overwhelmed; choose the detail that stands out to you most. For me, this was the roof, windows, bonnet and lights so I chose to concentrate on getting this right.
The roof and the windows and wheels trims can be cut from the same colour fondant. Using a sharp knife cut out the shape of the roof from thicker fondant and the windows & wheel trims from thinly rolled fondant. Put the windows aside to dry & trims aside to dry.
Use cooled boiled water or edible glue to attach the roof, once in position gently smooth the edges.
Once the windows & wheel trims have hardened slightly, brush them with silver ‘lustre dust’ to give a sheen to resemble glass/metal. These can then be attached using the method above.
Using a fondant gun, make the trim for around the windows, if you don’t have a gun then roll the fondant into a thin sausage shape trying to keep the width as even as possible.
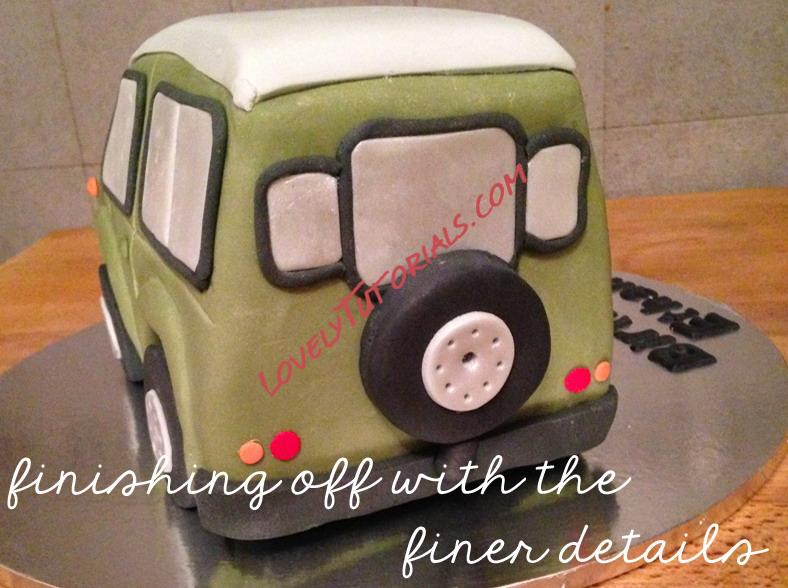
Additional detailing can be created using various cake decorating items, just think creatively! The lights can be cut out using various sized icing nozzles, the doors can be ‘drawn’ on by making impressions directly onto the fondant. The bonnet is simply another piece of fondant trimmed to size with the edges smoothed to give a more realistic finish. You can add as much or as little detail as you like!


